Showing posts with label DIY. Show all posts

Saturday, November 17, 2012

Hit the Bench

I've thought for a while now that a bench at the foot of my bed would be a great touch for that side of the room. I couldn't get anything I wanted (like this one) for less than $200 (which, I will admit, really isn't that bad), so I decided to go ahead and make one.

I've never made a piece of furniture before, but why would that stop me? (Cause me pause? Sure. Stop me? Never!) It really wasn't that bad.

Materials List:

Tools List:
Here is my pile of supplies in the "workshop" on Saturday morning. (Yes, it's in the unfinished basement.)


Here is that same pile after I cut what I thought was all of the pieces I would need--four 12" legs, two long side pieces and two short side pieces. Then I changed the design for structural reasons and cut two more short side pieces for a total of four, and a cross brace to go in the middle. The legs were the only things I measured. Everything else I held up to the piece of plywood and marked where it needed to be cut to fit.


 I spent the next hour or two drilling pocket-holes using my new jig. Seriously, I love this little jig. The pocket holes look awesome and don't leave any exterior screw or nail holes to deal with!

For more info on using this little jig, just search for the name. Basically, you use a clamp to hold the jig in place then drill away. The instructions that came with the kit explained everything really well, I thought. (Note to self: scan instructions so that you don't lose them.)


This is what the frame looked like all assembled. Thanks, Dear, for helping with this part.


I think it turned out pretty well. Don't those pocket-holes look great?


On Monday I hauled the frame out to the garage and applied three thin coats of satin espresso Minwax PolyShades. The back of the can says to wait six hours and sand with fine grit steel wool between coats. I went with an insider tip and applied each coat before the last one dried all the way. I waited about 1-2 hours between coats. No sanding required and I got it all done in half a day. Win-win.

While the last coat of stain was drying, I started on the upholstered top. I cut my 2' wide piece of foam at 16" intervals using an electric knife--the tool of choice for cutting foam (I keep one in my craft supplies just for this purpose)--for two 2'x16" rectangles. You see where I'm going with this since the plywood is 16"x4', right?


After cutting, I paused to wonder how I should glue the foam down to the wood. I wasn't a big fan of not gluing it and hoping it wouldn't shift. I decided to try good 'ol Elmers white school glue. When that didn't seem to be working, I got online and found that a lot of people were recommending using liquid nails. I don't happen to have any, so I thought "Great. Now I have to make another trip to the hardware store. Oh, joy." (In case you didn't catch it, that was sarcasm right there.) However, I came back after doing my research/being distracted by kids/talking to the Mr., and discovered that the white glue had worked! It just needed that hour to set. Woo-hoo! Elmers white school glue wins again! It's amazing to me how often that happens.


Flash forward to Tuesday. Tuesday was upholstery day. :D I covered the foam/plywood structure with quilt batting and stapled it down, trying to leave enough room for the frame so I would be trying to screw through staples later.


 This is how I folded the corners. There are YouTube videos out there that show how to round the corners, if you prefer that look. I also trimmed the excess batting.


Here I set the top on the frame to see how it was shaping up. Lookin' pretty good!


After prewashing the corduroy to help get the wrinkles out since one can't iron this stuff (not to mention that prewashing fabric is a good idea anyway), I spread it over the top on the frame, wrong side up, and pinned the corners, like so. I really wanted that professional, tailored look, so I sewed the corners of the fabric cover.


The tops of the corners were sticking out funny, so I grabbed by nearest favorite cylinder (my pencil can) and marked rounded corner stitch lines.


It's hard to see in this photo, but this is what the final corners look like. They lay much better.


Here's a fit test to make sure everything is looking good before I go on to the next step.


It passed the fit test, so I turned it right-side-out...


 ..flipped it upside-down and started stapling.


A few notes on stapling: pull the fabric as snug as you can, make sure the excess fabric on the corners is not bunching up (I pulled mine toward the center of the short ends), give each staple a few whacks with a hammer to make sure that aren't sticking out at all. And don't skimp on the staples!

Trim the excess fabric, screw the top on the frame, and voilĂ ! One custom 16"x48"x18 3/4" bench. Not too shabby.


One day I plan to add silver-toned nail head trim to the lower edge of the cushion, but part of me is secretly hoping that if I wait long enough someone will start selling rhinestone nail head trim. Hee-hee!

Monday, February 20, 2012

Mini Bins

I'm on an organizing rampage this week. I do not enjoy cleaning my house because of all of the clutter. Ugh! It drives me nuts.

I was reading about starting with organizing, not cleaning. I have a tendency to shove stuff out of the way (a closet, drawer, box, etc.) just so that I can do the actual cleaning. This week I decided to ignore the scrubbing part and just focus on making a place for everything and putting everything in its place.

On Saturday I started with my closet and bathroom. I didn't finish anything, but made some good progress. Also, in an effort to create a place for everything, I made some little organizing bins for my once-a-month products. They turned out so cute!

Here is the cabinet in the water closet where I keep all of that stuff.


And here are the new bins. Didn't they turn out well?


I started with some small, empty boxes that were literally lying around. I taped all of the edges with packing tape, and cut open the tops (formerly the fronts).


Then I covered them in fabric. The finishing touch was adding the large eyelets to the fronts. I tell you, hardware to a project is frosting to a cupcake. It's just not quite finished without it.


See how nicely the boxes fit in the cabinet? It's fate, I tell you. These bins were meant to be!


They're beautiful, solve a storage/organizing problem, and didn't cost me a cent! One can't ask for more than that.


Now if I can come up with cute storage for the products that go on the lower shelf, I can take the paper out of the door. One victory at a time. :)

Wednesday, January 25, 2012

Feather Pendant: Over-priced and Easy (Most Likely) to DIY

I'm sorry, but why on earth would someone pay $2,295.00 for this light fixture? I haven't tried it, but I bet I could make the shade for less than $100.


The base is only chicken wire.


And cording was attached on the top.


My supplies list would look like this:
  • Old, ugly, bare chandelier
  • Spray paint
  • Washer-top lamp ring
  • Plain bottom lamp ring
  • Chicken wire
  • Feather boas
  • Small rope cording
  • Large rope cording
  • Fine gauge wire (for assembly)
  • Hot glue and gun

As I said, I haven't done it, and I just barely found this light fixture here, but I imagine that assembly would go like this:
  1. Clean and spray paint old, ugly chandelier. Let dry.
  2. Cut chicken wire to fit around the lamp rings, and produce the desired height. (Washer-top ring is the top.)
  3. Build frame by wiring chicken wire to lamp rings.
  4. Attach feather boas to frame with wire.
  5. Hot glue rope cording around the top edge.
  6. Fit washer-top ring around your freshly painted chandelier.
  7. Install in ceiling.
So, really, why oh why would anyone pay $23k when they could make it for a fraction of that cost? Does anyone have any thought on improvements/problems with my DIY plan?

Wednesday, January 11, 2012

Laundry Gets Some Love

Remember this post from a while ago when I stumbled upon the idea of adding vinyl decals to my washer and dryer? (I'm always looking for ways to brighten up the laundry room so that the task of washing, drying, folding and putting away clothes isn't so, um... cringe inducing.)

kevin {&} amanda
Sunday night I decided to take the plunge and do it. The hardest part was selecting an image! I put my Cameo and pink vinyl to work making several flower decals. Then I wiped down the fronts of my washer and dryer to ensure I had a clean surface to work with.

Applying the decals was just like applying a vinyl decal to any surface, using transfer tape. Applying the decals around the doors was a little more involved, though.

First, I placed the decal where I wanted using the transfer tape.


It looks great, but it needs a little work.


Second, I cut the vinyl along the seam using either a craft knife or small scissors.


Third, I cut the vinyl around the door frame using a craft knife. Tip: Don't throw out the parts you cut off! 


Here it is five flowers in. Looking pretty good, so far!


I added another smaller flower, and spread around the extra petals that were overlapping on the doors. I put the cut ones up against the door frame for that nice continuous look. Waste not!


It's a work in progress. I've ordered some light gray vinyl to work in a two-toned effect and add some more petals. It should be here tomorrow. I'm so excited! (Is it sad that I get excited over rolls of vinyl and transfer paper being delivered?)

For another look at how someone put their Silhouette Cameo to work to dress up their laundry room, check out this post at Sugar Bee Crafts. :)

Sugar Bee Crafts
Tune in tomorrow to see how a blank wall and a storage problem are helped by a trip to Ikea.

Saturday, December 10, 2011

Bud Vases, Anyone?

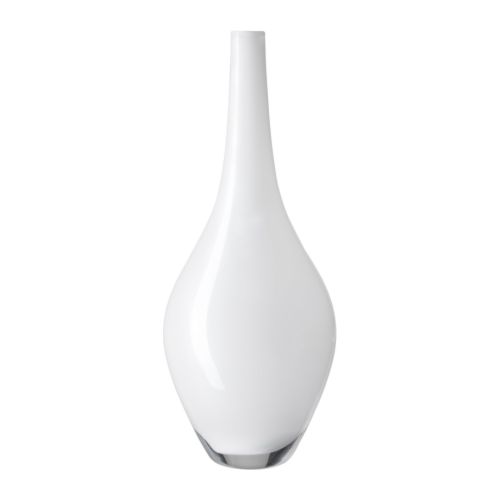
I've been wanting some bud vases for a while now, but they seem so expensive! Okay, so they aren't actually expensive, but they are more than I am willing to pay. The style I am looking for is something streamlined with a narrow neck, like these vases from Z Gallerie, Crate&Barrel and Ikea, respectively, only smaller.

Lithe Aubergine Vase | Z Gallerie
Cooper Tall Vase | Crate&Barrel
SALONG Vase | Ikea
This leaves me with two options: wait for a killer sale (not likely), or DIY a substitute. Guess which one is more likely to happen? Yeah, that's what I thought.

There is a DIY solution (there always is) to my problem that is apparently a common problem for many a thrifty DIY home decorator. The most popular fix is to collect some glass bottles, dress them up with a little puffy paint, and spray paint them in the color of your choice. The first time I saw this done, it was in white and reminded me of a Johnathan Adler piece.

Jessy of Fairytale Frosting put together a tutorial of how she upcycled some used bottles into chic vases on her blog here. Check it out!

Fairytale Frosting
Since no one around here is likely to have a drinking party anytime soon ever, and I don't want my vases branded with 'IBC' (although it would make a good conversation piece), I think I'm going to start scouring thrift stores and clearance aisles for good bottles with nice silhouettes. Or I may just break down and buy the cute little white ones at Michaels with 40% off coupons. Not likely, but stranger things have happened!

Thursday, December 8, 2011

Super Awesome and Totally Juicy Painted Rug Tutorial

I just found my new addiction. This chick is definitely a girl after my own heart. I've only seen a few things on her blog, www.almost40yearoldintern.com, but I am loving every bit of it!

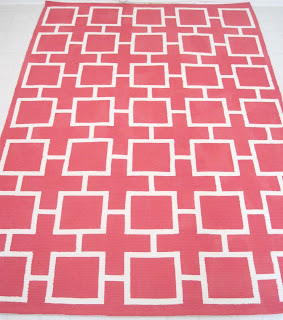
For instance, I've seen a lot of people buying Ikea's ERSLEV rug in white and painting it; but not only does this girl use awesome patterns and colors and share very detailed tutorials with lots of pictures (have I ever mentioned that I'm a picture person?), she also tells you exactly which products she used--with links--so you know for sure what she is talking about! (Whew. Can you say longest sentence ever?)

But that's not even the best part, at least to me. In the other tutorials I have read about painting a flatwoven rug, the dear DIY-ers have mostly been using plain latex paint. That always felt wrong for some reason. The (formerly almost) 40 year old intern shed some light on why this is. One needs to add a fabric medium to the latex paint before painting the rug. Can I get a collective 'ah...'?

You can check out all of the juicy details on her rugs here,

Fab Pink Geometric Painted Rug
and here.


Groovy Modern Lemon Yellow Geometric Starburst Rug
See? I told you they are super awesome and totally juicy!

Dear! We need to go to Ikea!

Monday, December 5, 2011

Appliance Awesomeness

I was browsing the blogsphere for a Christmas card idea, actually, when I stumbled upon this.

kevin {&} amanda
Someone used their Silhouette Cameo to make vinyl decals for their washing machine. Can I just say that my mind has been blown by sheer awesomeness. One day I hope to be cool enough to think of doing something like this on my own. In the mean time, I really need to get some pink and black vinyl to dress up my laundry room appliances!

Anyone else dressed up their appliances lately? Are you scraping your jaw off the floor, too? Want to open a pool to bet how long it is going to take me to actually get around to doing this?

Tuesday, November 29, 2011

The First Cuts

My new Cameo arrived on Monday. Darin didn't want me to open it. Something about it being a Christmas present and I couldn't play with it until then? I don't know. Anyway, I've been experimenting with it and am pleased as pop (is my family the only one that uses that expression?) with it.  See, happiness ->  :)


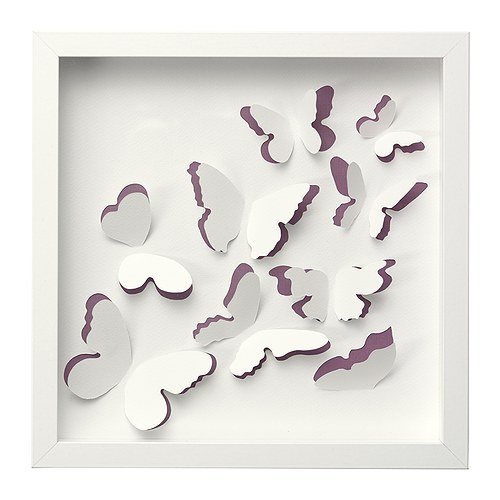
Yesterday I used it to finish a project that I have been stewing over for a while. I saw this at Ikea and was totally inspired. I decided to do my own version for my little sister for Christmas.
Ikea OLUNDA
After figuring out how the Silhouette Studio software works (which you can download for free here, by the way), I put together this little number in barely anytime at all. A little cardstock; a sheet of patterned pink, scrapbook paper; a $6 scrapbook frame from Walmart; and I was in business. Not bad for a first project.


When I first conceived this idea two months ago, I was planning on doing a simpler design and cutting it by hand. I am so glad I waited! I was able to get so many intricate details with the Silhouette Cameo and it is so pretty! I especially love how the fairy's wings turned out. I really hope my sister likes it. :)

Monday, November 28, 2011

Perpetual Birthday Calendar

My hubby and I were talking to his sister last night, and we got on the subject of birthdays. It dawned on me when she mentioned that her husband's birthday is coming up, that I need a birthday calendar.

I thought about designing my own, but why do that when there are plenty of cute ones out there that I can download for free? I have other things to do with my time today than spend hours deciding on a scheme, searching for clip art, and designing my own calendar.

After a quick Google image search for "perpetual birthday calendar free," I settled on this calendar by Elephantshoe Stationery Studios at The Pretty Blog.

http://www.theprettyblog.com/2011/07/birthday-calender-free-printables/
After printing on cardstock and cutting with my Fiskars paper trimmer, I decided to hang it on the wall next to my calendar (so I don't lose it). I used a small hole-punch to--you guessed it--punch a small hole at the top of each page. To keep things simple, I chose to hang the pages on a small nail. At the beginning of every month I'm going to have to take all twelve pages down to rotate to the new month, but it's a small price to pay since I am doing this on the cheap and not having my calendar spiral bound.


Super easy and the whole project probably took no more than half an hour! Love it! Now to track down all of those birthdays and fill it in...

Are you in need of a perpetual birthday calendar? Got any super simple paper projects in the works?

PS. In case you are wondering, I cut one page then used it as a guide to cut the other eleven so that they would all be the same size. Then I used a scrap of cardstock as a template to ensure that all of the punched holes would line up.

Wednesday, November 23, 2011

Quick and Pretty Dollar Store Project

I've been preoccupied lately with making file folder games for my toddler, but I did squeeze in this little project.

I bought a little vase and candlestick on my last trip to Dollar Tree. I had already purchased the Glass Bond for another project (I looked for E6000, which seems to be the most popular adhesive for projects like this, but I think my Hobby Lobby was sold out), so I would say that the grand total for this project was $2.


I simply adhered the vase to the candlestick, following the directions on the Glass Bond. It was so simple, but I think the finished product is quite pretty. Of course I'm a sucker for clear glass.


I'm excited by how versatile this little piece is. It's not very large, but I can use it as a vase for a small bunch of flowers, a votive candle holder, a candy dish, or serve plastic silverware or condiments out of it at a party.

Have any quick and inexpensive projects you've been working on? Any guesses for what I'm going to fill it with for the holidays? (I don't know the answer myself, but I'm looking forward to discovering it!)

Monday, November 21, 2011

One More Thing for the Wall

By now you are probably all sick of reading about my gallery wall, but I did have one more project in the works that I decided to finish after posting about the wall. It is now finished and hung with all the others.

It all started, like so many things, with Pintrest. I saw this and completely fell in love.


It's black, it's shiny, it's contemporary, and it sparkles. Basically, it's everything that I love in decor.

I had a necklace rack that I made about fifteen years ago, with my mom's help, that I wanted to repurpose as wall art. I had incorporated it in the original gallery wall layout, but didn't know how I wanted to decorate it. After seeing this centerpiece, I decided to do an interpretation of it on my old necklace rack.

I started by purchasing a length of crystal garland, some large crystal drops, jewelry chain, and a package of jumprings.


I attached the large drops to sections of the crystal garland and chain (this will make a lot more sense in pictures below), and I spray painted the necklace rack with black gloss spray paint left over from the canvas piece I did a couple of weeks ago. Once the paint was dry, I attached the lengths of crystal with jumprings.


It was looking mighty fine at this point, but was still a bit plain. I decided to try something that I had been pondering and Google searched about. I decided to try using contact paper to add some text to the piece. Ideally I would have used vinyl, but I'm working with what I got.


After settling on a font and size, I printed the word "Family" and taped it to my self-healing mat on top of a piece of white contact paper (also known as adhesive shelf liner). Then I got to work with my craft knife. (Have I mentioned that I want a Silhouette?)

After cutting out each letter, I tried a tip I had read about in blog land--using drywall tape in lieu of transfer tape. I cut a length of drywall tape and placed it over my whole cut piece, then carefully removed the pieces I didn't want (the outside pieces, if you will) so that the letters will still lined up straight. I flipped the whole thing over and removed the backing to expose the sticky side of the contact paper.


I stuck the whole thing on my painted former-necklace rack and thoroughly rubbed the whole thing to make sure it was good and stuck. Then carefully peeled back the drywall tape, making sure that I didn't pull up any contact paper with it, rubbed the letters again for good measure, and stepped back to admire my work.


I think it actually turned out very well. You can't even tell it isn't vinyl from a distance.


And with it hung on the wall as it is, no one is likely to take a close look at it; just stand there and admire it. Oh, am I the only one who does that?


Anyone have some brilliant (and cheaper) alternatives they would like to share? Any new crafts that you sit back and lovingly admire? Have you been inspired lately to reinterpret something you have seen and love to fit your needs?

PS. This project was updated on 1/13/2012 at Updates to "The Wall" with Cameo.