Showing posts with label tutorial. Show all posts

Saturday, November 17, 2012

Hit the Bench

I've thought for a while now that a bench at the foot of my bed would be a great touch for that side of the room. I couldn't get anything I wanted (like this one) for less than $200 (which, I will admit, really isn't that bad), so I decided to go ahead and make one.

I've never made a piece of furniture before, but why would that stop me? (Cause me pause? Sure. Stop me? Never!) It really wasn't that bad.

Materials List:

Tools List:
Here is my pile of supplies in the "workshop" on Saturday morning. (Yes, it's in the unfinished basement.)


Here is that same pile after I cut what I thought was all of the pieces I would need--four 12" legs, two long side pieces and two short side pieces. Then I changed the design for structural reasons and cut two more short side pieces for a total of four, and a cross brace to go in the middle. The legs were the only things I measured. Everything else I held up to the piece of plywood and marked where it needed to be cut to fit.


 I spent the next hour or two drilling pocket-holes using my new jig. Seriously, I love this little jig. The pocket holes look awesome and don't leave any exterior screw or nail holes to deal with!

For more info on using this little jig, just search for the name. Basically, you use a clamp to hold the jig in place then drill away. The instructions that came with the kit explained everything really well, I thought. (Note to self: scan instructions so that you don't lose them.)


This is what the frame looked like all assembled. Thanks, Dear, for helping with this part.


I think it turned out pretty well. Don't those pocket-holes look great?


On Monday I hauled the frame out to the garage and applied three thin coats of satin espresso Minwax PolyShades. The back of the can says to wait six hours and sand with fine grit steel wool between coats. I went with an insider tip and applied each coat before the last one dried all the way. I waited about 1-2 hours between coats. No sanding required and I got it all done in half a day. Win-win.

While the last coat of stain was drying, I started on the upholstered top. I cut my 2' wide piece of foam at 16" intervals using an electric knife--the tool of choice for cutting foam (I keep one in my craft supplies just for this purpose)--for two 2'x16" rectangles. You see where I'm going with this since the plywood is 16"x4', right?


After cutting, I paused to wonder how I should glue the foam down to the wood. I wasn't a big fan of not gluing it and hoping it wouldn't shift. I decided to try good 'ol Elmers white school glue. When that didn't seem to be working, I got online and found that a lot of people were recommending using liquid nails. I don't happen to have any, so I thought "Great. Now I have to make another trip to the hardware store. Oh, joy." (In case you didn't catch it, that was sarcasm right there.) However, I came back after doing my research/being distracted by kids/talking to the Mr., and discovered that the white glue had worked! It just needed that hour to set. Woo-hoo! Elmers white school glue wins again! It's amazing to me how often that happens.


Flash forward to Tuesday. Tuesday was upholstery day. :D I covered the foam/plywood structure with quilt batting and stapled it down, trying to leave enough room for the frame so I would be trying to screw through staples later.


 This is how I folded the corners. There are YouTube videos out there that show how to round the corners, if you prefer that look. I also trimmed the excess batting.


Here I set the top on the frame to see how it was shaping up. Lookin' pretty good!


After prewashing the corduroy to help get the wrinkles out since one can't iron this stuff (not to mention that prewashing fabric is a good idea anyway), I spread it over the top on the frame, wrong side up, and pinned the corners, like so. I really wanted that professional, tailored look, so I sewed the corners of the fabric cover.


The tops of the corners were sticking out funny, so I grabbed by nearest favorite cylinder (my pencil can) and marked rounded corner stitch lines.


It's hard to see in this photo, but this is what the final corners look like. They lay much better.


Here's a fit test to make sure everything is looking good before I go on to the next step.


It passed the fit test, so I turned it right-side-out...


 ..flipped it upside-down and started stapling.


A few notes on stapling: pull the fabric as snug as you can, make sure the excess fabric on the corners is not bunching up (I pulled mine toward the center of the short ends), give each staple a few whacks with a hammer to make sure that aren't sticking out at all. And don't skimp on the staples!

Trim the excess fabric, screw the top on the frame, and voilĂ ! One custom 16"x48"x18 3/4" bench. Not too shabby.


One day I plan to add silver-toned nail head trim to the lower edge of the cushion, but part of me is secretly hoping that if I wait long enough someone will start selling rhinestone nail head trim. Hee-hee!

Wednesday, January 25, 2012

Feather Pendant: Over-priced and Easy (Most Likely) to DIY

I'm sorry, but why on earth would someone pay $2,295.00 for this light fixture? I haven't tried it, but I bet I could make the shade for less than $100.


The base is only chicken wire.


And cording was attached on the top.


My supplies list would look like this:
  • Old, ugly, bare chandelier
  • Spray paint
  • Washer-top lamp ring
  • Plain bottom lamp ring
  • Chicken wire
  • Feather boas
  • Small rope cording
  • Large rope cording
  • Fine gauge wire (for assembly)
  • Hot glue and gun

As I said, I haven't done it, and I just barely found this light fixture here, but I imagine that assembly would go like this:
  1. Clean and spray paint old, ugly chandelier. Let dry.
  2. Cut chicken wire to fit around the lamp rings, and produce the desired height. (Washer-top ring is the top.)
  3. Build frame by wiring chicken wire to lamp rings.
  4. Attach feather boas to frame with wire.
  5. Hot glue rope cording around the top edge.
  6. Fit washer-top ring around your freshly painted chandelier.
  7. Install in ceiling.
So, really, why oh why would anyone pay $23k when they could make it for a fraction of that cost? Does anyone have any thought on improvements/problems with my DIY plan?

Friday, January 20, 2012

Stairs of Entertainment

I have a crying baby on my lap, so hopefully I can be brief.

When we moved to Denver after graduation, I was overjoyed to have a real theater in town. Darin and I have seen The Phantom of the Opera, Wicked, Blue Man Group and The Lion King. We are too cheap to shell out the extra money for a collector's program, but I'm okay with the free programs that are full of advertisements. The covers still look nice and get the point across.

I still have the programs and tickets for Phantom and Wicked somewhere (I hope), maybe Blue Man Group, but I had a plan in mind to start hanging these mementos by the time we saw Lion King this past November, so I still knew where that stuff was.

The stairs leading to our unfinished basement has an entertainment theme to it. Since I eventually want a projector system with surround sound down there, this seems appropriate. But being that it is a basement stairwell, not well lit, and typically behind a closed door, I haven't felt the need to shell out the big bucks for nice frames. This is what I have done instead.

I found a two-pack of 18"x12" frames at Michaels for $8. Four bucks a frame? Score! Ideally, I would be able to use floating frames, but that is even more expensive than regular frames. I decided on a compromise by using black poster board as a background. Unfortunately, I didn't have any black on hand. After thinking about how I didn't want to go shopping for new sheets of poster board for two days, I decided to try an experiment with the yellow poster board I did have laying around--and that I would probably end up never using. (It came in a pack of assorted colors.)

Here we have the frame, poster board, program and ticket.


First I set the poster board on a self-healing mat and used the glass from the picture frame as a template for cutting the poster board using a craft knife.


I was able to get two 18"x12" pieces out of one sheet. I laid them in my "painting box" (a cardboard lid from a box for set of shelves we bought last year) and got ready to test my theory about painting poster board.


I didn't want the finished pieces to have an unnatural sheen, so I used flat black spray paint. I several light coats of paint. I kept on making passes until the poster boards were evenly coated. Then I let them dry overnight.


This is how it looked the next morning. I would deem this experiment a success! I'm so relieved that it worked so I no longer have to wonder what I'm going to do with all of those sheets of blue, green and yellow poster board I have. (They are left overs from when Darin built the boys a train for Halloween.)


Here it is all together. I used glue dots to hold the ticket in place, but the program is thick enough that the pressure between the glass and the backing is enough to keep it from sliding.


We also got a poster signed by the cast, that night. We would not have done it, but they were doing this thing where one could get a free poster for donating to a charity they were supporting. We decided to support the charity, so we got a poster. It is also mounted on a piece of black poster board, but in a larger frame I picked up at Walmart.


Here are the hangings at the bottom of the stairs. The blank one I hung just so that it wouldn't get lost/marred/broken. I'll fill it with a program and ticket with one of the other productions we've been too, if I find them; or a program and ticket from when we see Beauty and the Beast in March. Wicked is also back in town. We are still on the fence about whether or not to see it again since tickets can be kind of pricey.


Anyway, on the other side of the stairwell is a ledge that only makes sense when you see how they constructed the basement in relation to the garage. It's one of those oddities that when you first move in you look at it and think, "What am I ever going to do with that?" But I quickly decided that it was an excellent place for storing our ever expanding DVD/Blu-ray/Wii games collection.


This is what it looks like from the top of the stairs. I'm looking forward to filling the wall on the right over the years as we attend more stage productions. And we are almost to the point where we are going to start installing shelves on the left to make room for more disks. It's kind of exciting for me to look at stuff like this, all of that blank wall space, and see the opportunities in future years that it represents. :)

Wednesday, January 11, 2012

Laundry Gets Some Love

Remember this post from a while ago when I stumbled upon the idea of adding vinyl decals to my washer and dryer? (I'm always looking for ways to brighten up the laundry room so that the task of washing, drying, folding and putting away clothes isn't so, um... cringe inducing.)

kevin {&} amanda
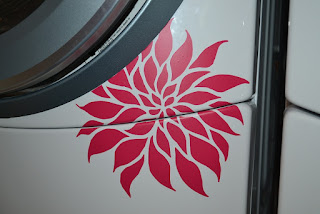
Sunday night I decided to take the plunge and do it. The hardest part was selecting an image! I put my Cameo and pink vinyl to work making several flower decals. Then I wiped down the fronts of my washer and dryer to ensure I had a clean surface to work with.

Applying the decals was just like applying a vinyl decal to any surface, using transfer tape. Applying the decals around the doors was a little more involved, though.

First, I placed the decal where I wanted using the transfer tape.


It looks great, but it needs a little work.


Second, I cut the vinyl along the seam using either a craft knife or small scissors.


Third, I cut the vinyl around the door frame using a craft knife. Tip: Don't throw out the parts you cut off! 


Here it is five flowers in. Looking pretty good, so far!


I added another smaller flower, and spread around the extra petals that were overlapping on the doors. I put the cut ones up against the door frame for that nice continuous look. Waste not!


It's a work in progress. I've ordered some light gray vinyl to work in a two-toned effect and add some more petals. It should be here tomorrow. I'm so excited! (Is it sad that I get excited over rolls of vinyl and transfer paper being delivered?)

For another look at how someone put their Silhouette Cameo to work to dress up their laundry room, check out this post at Sugar Bee Crafts. :)

Sugar Bee Crafts
Tune in tomorrow to see how a blank wall and a storage problem are helped by a trip to Ikea.

Thursday, December 8, 2011

Super Awesome and Totally Juicy Painted Rug Tutorial

I just found my new addiction. This chick is definitely a girl after my own heart. I've only seen a few things on her blog, www.almost40yearoldintern.com, but I am loving every bit of it!

For instance, I've seen a lot of people buying Ikea's ERSLEV rug in white and painting it; but not only does this girl use awesome patterns and colors and share very detailed tutorials with lots of pictures (have I ever mentioned that I'm a picture person?), she also tells you exactly which products she used--with links--so you know for sure what she is talking about! (Whew. Can you say longest sentence ever?)

But that's not even the best part, at least to me. In the other tutorials I have read about painting a flatwoven rug, the dear DIY-ers have mostly been using plain latex paint. That always felt wrong for some reason. The (formerly almost) 40 year old intern shed some light on why this is. One needs to add a fabric medium to the latex paint before painting the rug. Can I get a collective 'ah...'?

You can check out all of the juicy details on her rugs here,

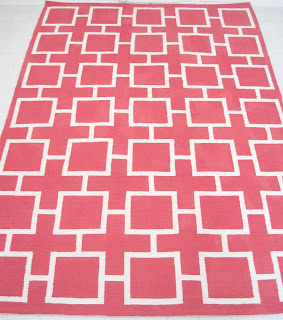
Fab Pink Geometric Painted Rug
and here.


Groovy Modern Lemon Yellow Geometric Starburst Rug
See? I told you they are super awesome and totally juicy!

Dear! We need to go to Ikea!

Monday, November 21, 2011

One More Thing for the Wall

By now you are probably all sick of reading about my gallery wall, but I did have one more project in the works that I decided to finish after posting about the wall. It is now finished and hung with all the others.

It all started, like so many things, with Pintrest. I saw this and completely fell in love.


It's black, it's shiny, it's contemporary, and it sparkles. Basically, it's everything that I love in decor.

I had a necklace rack that I made about fifteen years ago, with my mom's help, that I wanted to repurpose as wall art. I had incorporated it in the original gallery wall layout, but didn't know how I wanted to decorate it. After seeing this centerpiece, I decided to do an interpretation of it on my old necklace rack.

I started by purchasing a length of crystal garland, some large crystal drops, jewelry chain, and a package of jumprings.


I attached the large drops to sections of the crystal garland and chain (this will make a lot more sense in pictures below), and I spray painted the necklace rack with black gloss spray paint left over from the canvas piece I did a couple of weeks ago. Once the paint was dry, I attached the lengths of crystal with jumprings.


It was looking mighty fine at this point, but was still a bit plain. I decided to try something that I had been pondering and Google searched about. I decided to try using contact paper to add some text to the piece. Ideally I would have used vinyl, but I'm working with what I got.


After settling on a font and size, I printed the word "Family" and taped it to my self-healing mat on top of a piece of white contact paper (also known as adhesive shelf liner). Then I got to work with my craft knife. (Have I mentioned that I want a Silhouette?)

After cutting out each letter, I tried a tip I had read about in blog land--using drywall tape in lieu of transfer tape. I cut a length of drywall tape and placed it over my whole cut piece, then carefully removed the pieces I didn't want (the outside pieces, if you will) so that the letters will still lined up straight. I flipped the whole thing over and removed the backing to expose the sticky side of the contact paper.


I stuck the whole thing on my painted former-necklace rack and thoroughly rubbed the whole thing to make sure it was good and stuck. Then carefully peeled back the drywall tape, making sure that I didn't pull up any contact paper with it, rubbed the letters again for good measure, and stepped back to admire my work.


I think it actually turned out very well. You can't even tell it isn't vinyl from a distance.


And with it hung on the wall as it is, no one is likely to take a close look at it; just stand there and admire it. Oh, am I the only one who does that?


Anyone have some brilliant (and cheaper) alternatives they would like to share? Any new crafts that you sit back and lovingly admire? Have you been inspired lately to reinterpret something you have seen and love to fit your needs?

PS. This project was updated on 1/13/2012 at Updates to "The Wall" with Cameo.

Friday, November 18, 2011

Let It Snow! Coffee Filter Snowflake Tutorial

Is it too early to be thinking about Christmas? Absolutely not! But this post isn't about that. This post is about the fact that I have 200+ coffee filters cluttering up my space. They need to get out of the plastic bag I corralled them in and start doing something useful!


While skimming along in blog-land trying to find a use for these freeloaders, I noticed that quite a few people making the most extraordinary things from coffee filters--flowers, wreathes, bats, spiderwebs, and snowflakes. I, like you, thought it was too early to start making snowflakes; then I thought about the sheer number of coffee filters I have, waiting to be used. I quickly changed my mind. If I start now I might be done by December (or January).

Here's how I do it:
Step 1: Fold & Cut
Fold the coffee filter into twelfths (for a six pointed snowflake), then channel your inner kindergartner and cut those snowflakes! (The one I cut here was supposed to look like a spider web in honor of Halloween; but I didn't like how it turned out, so I didn't post about this back in October.)

Step 2: Starch
... and Dry
I wanted to give my snowflakes a little stiffness since coffee filters are the weight of heavy tissue paper, so I sprayed them with heavy starch and let them air dry on an old towel.

Step 3: Iron
You may notice that the snowflakes look a bit crumpled after being starched. Once they are dry, iron them flat. I used a medium-high setting on my iron. (Tip: Be careful not to accidentally fold over a piece and iron it down. I almost did this a lot.)

And here is the finished product!


At this point, you are free to put them wherever you like--on a window, the inside of a vase, taped on a package, under a clear glass cookie or pie plate. Wherever your imagination leads you!

I chose to tape mine to the wall.


I find it very fun and festive. And it's fascinating to me to see how many different patterns I can come up with!


Have you been channeling your inner kindergartner lately? Are you gearing up for some winter festivities? Have any Christmas decorating plans in the works?