Thursday, December 15, 2011

I Am Waiting for Vizzini... Er, I Mean FedEx

In the words of Inigo Montoya, I hate waiting.

Let me explain. No, there is too much. Let me sum up. I've been using a Canon point-and-shoot for the last four years. It has served us well enough. But a few weeks ago it started complaining about needing new batteries. You put fresh batteries in, and it starts complaining again after a few shots. I test the batteries and they are still charged, but you have to put in fresh ones anyway. Last week this problem reached new heights when I could only get off three shots before needing to change the batteries. That's right. Count them. Three.

My hubby and I spent the weekend shopping for a new camera. He has wanted an SLR for a while now, so this seemed like a good opportunity.

We settled on the Nikon D3100. It is a good camera for beginners and takes professional quality photos. We ordered a refurbished model on Monday at RitzCamera.com for $500, which is a smokin' deal for a piece of hardware of this caliber.

Nikon D3100 | RitzCamera.com
I am dying to get this camera so that I can start taking pictures again! It is supposed to arrive today. I hope it gets here before the sun goes down and I'm stuck with bad lighting for checking out our new toy.

Wednesday, December 14, 2011

I Love It When A Tool Kit Comes Together

(Yes, that was an A-Team reference.)

I've been belly-aching to my poor, long-suffering husband about wanting a tool set to use with my new Silhouette Cameo. Today, I found one. The Cgull kit has all of the tools I'm looking for, and on ebay I can get one for ~$16! Eureka!

http://www.cgull.com/products/toolkit.html

Monday, December 12, 2011

Dangerous Ideas

I have been on a gleaning-ideas-from-my-fellow-bloggers kick lately. First, there was the rug. Then there were the owls. (And honestly, I think we can all admit that most good ideas were first thought up by someone else, anyway.) My most recent idea is perhaps one of my most dangerous. I can totally see myself going crazy with this one.

I read, "My refrigerator looks sad but unfortunately it's a built-in one so I can't use magnets. But I guess I could take some vinyl decals and decorate the whole kitchen :)" here. I could feel the lightning bolt hitting my brain.

A long time ago, there was an episode of Color Splash where David was doing this Asian/contemporary kitchen and he painted (or stained?) flowers on the upper cabinets. I thought it was a fabulous idea to decorate the doors like that. In a kitchen with wall-to-wall cabinets like mine (and many of yours, I'm assuming), there isn't a lot of wall space for decorating. Putting decals on the doors is like the best of all worlds (especially if you are like me and do not have designer cabinets with the varying heights and depths, etc. to make them interesting).

My Kitchen
If you do an online image search, you can find plenty of examples of other people doing this. But this one took the cake. Oh my gosh! Black, white, contemporary, flowers, circles--this is so beautiful!

http://www.womanlypage.com/coloured-kitchen-cabinets
I'm so grateful that Darin got Santa is getting me a Silhouette Cameo for Christmas. I can't wait to try this!

(PS. You can see a few other designs be clicking on the link under the photo.)

Saturday, December 10, 2011

Bud Vases, Anyone?

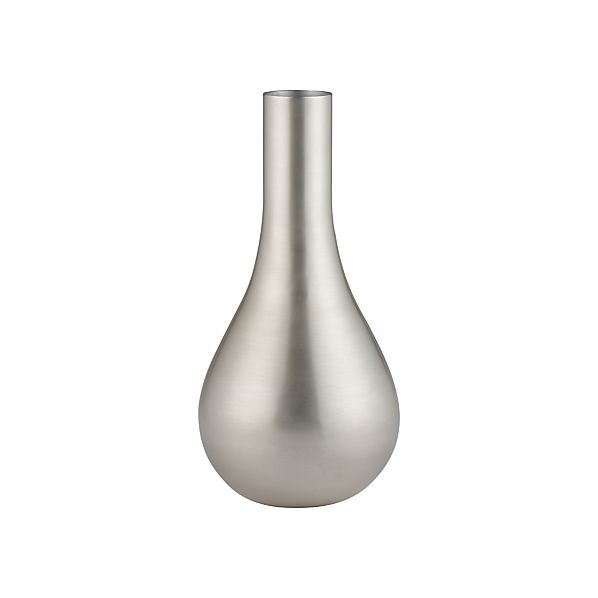
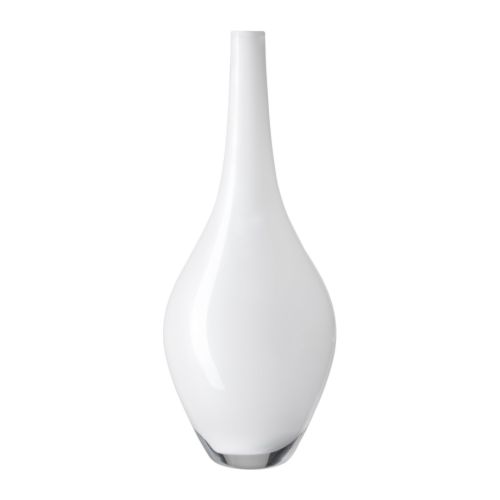
I've been wanting some bud vases for a while now, but they seem so expensive! Okay, so they aren't actually expensive, but they are more than I am willing to pay. The style I am looking for is something streamlined with a narrow neck, like these vases from Z Gallerie, Crate&Barrel and Ikea, respectively, only smaller.

Lithe Aubergine Vase | Z Gallerie
Cooper Tall Vase | Crate&Barrel
SALONG Vase | Ikea
This leaves me with two options: wait for a killer sale (not likely), or DIY a substitute. Guess which one is more likely to happen? Yeah, that's what I thought.

There is a DIY solution (there always is) to my problem that is apparently a common problem for many a thrifty DIY home decorator. The most popular fix is to collect some glass bottles, dress them up with a little puffy paint, and spray paint them in the color of your choice. The first time I saw this done, it was in white and reminded me of a Johnathan Adler piece.

Jessy of Fairytale Frosting put together a tutorial of how she upcycled some used bottles into chic vases on her blog here. Check it out!

Fairytale Frosting
Since no one around here is likely to have a drinking party anytime soon ever, and I don't want my vases branded with 'IBC' (although it would make a good conversation piece), I think I'm going to start scouring thrift stores and clearance aisles for good bottles with nice silhouettes. Or I may just break down and buy the cute little white ones at Michaels with 40% off coupons. Not likely, but stranger things have happened!

Friday, December 9, 2011

Meet the Owl Family

First of all, I have to say, don't owls make the cutest tchotchkes? I've been looking for a white porcelain one, or one with a cute silhouette at the thrift store that I can spray paint. But alas, no cute little owl for me. *sigh* But I digress. 

Yesterday was a good day for inspiration, apparently. First we had the juicy rugs that I wrote about. Then I was over at Our Humble A{Bowe}d looking at all of the author's Christmas decorations. She had the cutest little set of owls (one for each member of her family) on their entertainment center. She DIY-ed them from toilet paper tubes with a little paint and permanent marker. Super easy and so cute!

Our Humble A{Bowe}d
Unbeknownst to me, the creative part of my brain started turning its wheels, and a few hours later, an image popped into my head. I was very excited (and surprised) by this vision. Unfortunately it was bedtime, and Darin has this thing about me going to sleep at night. (What's up with that?) So it had to wait until this morning.

Much to my childrens' dismay, I got right to work. It started with a rough sketch, then became a Silhouette Studio design, then it became reality. (And it only took me three tries to get it right!)

Behold, my take on the Owl Family! Aren't they cute?


I skipped right to the good stuff. Once I had finished the design, I made some prototypes in white. First came this little one, which fits nicely over this dollar store vase with a tealight inside.


The second was a larger version. Doesn't it look great wrapped around the pillar candle?


I'm really loving this design, and I am very proud of myself for  designing it, truth be told. I keep on thinking of such fantastic uses for it. The wraps can go around vases, votives, candy dishes, pillar candles or stand alone. I've decided to make a version that I can use for framed art or vinyl decals. I might even try etching it on glass or stenciling it on a pillow. I'm excited to see where this goes!

Thursday, December 8, 2011

Super Awesome and Totally Juicy Painted Rug Tutorial

I just found my new addiction. This chick is definitely a girl after my own heart. I've only seen a few things on her blog, www.almost40yearoldintern.com, but I am loving every bit of it!

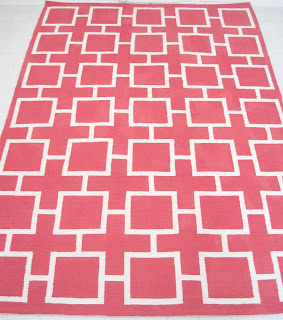
For instance, I've seen a lot of people buying Ikea's ERSLEV rug in white and painting it; but not only does this girl use awesome patterns and colors and share very detailed tutorials with lots of pictures (have I ever mentioned that I'm a picture person?), she also tells you exactly which products she used--with links--so you know for sure what she is talking about! (Whew. Can you say longest sentence ever?)

But that's not even the best part, at least to me. In the other tutorials I have read about painting a flatwoven rug, the dear DIY-ers have mostly been using plain latex paint. That always felt wrong for some reason. The (formerly almost) 40 year old intern shed some light on why this is. One needs to add a fabric medium to the latex paint before painting the rug. Can I get a collective 'ah...'?

You can check out all of the juicy details on her rugs here,

Fab Pink Geometric Painted Rug
and here.


Groovy Modern Lemon Yellow Geometric Starburst Rug
See? I told you they are super awesome and totally juicy!

Dear! We need to go to Ikea!

Wednesday, December 7, 2011

Up And Running And It Feels Oh So Good

Okay, so I never post twice in one day, but this feels like a special occasion. The new social media buttons have arrived and are up and running! In the words of the ever so awesome Sherry, holla! (Yeah, probably not going to say that again. I'm not as cool as $herdog.)

Anywho, you can now do all of those things I mentioned earlier today (plus email me) by clicking on one of those cute little icons (again, courtesy of MoxieTonic) on the right.


Also, a big thanks goes out to The Mama Hen for clearly explaining how to use the RSS feed thing. I probably read through a half dozen web posts before landing on hers. Thank you, Mama Hen!

And with that, I bid you goodnight.

Being Social

I decided this morning that I am going to try being social. :o I know, it's shocking. Basically, this is the breakdown:
  1. Open Twitter account
  2. Create a Facebook page
  3. Order a set of social media icons
This last one was actually a bit of a thrill for me since it represents my first Etsy purchase. I bought the icons from MoxieTonic. I hoping to get them soon and figure out how to install them on the sidebar. This is such a great shade of purple. (Did you know that I have a little obsession with purple?)

Round Web & Blog Buttons

In case you just can't wait for the new additions to the side bar, my Twitter is here.

Twitter

The new Facebook page is here.

Facebook
The not quite as new Pinterest boards are here.

Pintrest

And my Etsy shop (sitting sad and empty) here. I would like to list a few things on Etsy, but I draw a blank when I try to come up with something to make. Any suggestions?

Etsy

Next task (after figuring out how to embed the new buttons) is to figure out what exactly RSS feed is. It's just one of those things that I've seen the icon for, but never bothered to look into it. But it will have to wait for another day. I have hungry toddlers to feed, and they wait for no one.

Tuesday, December 6, 2011

Christmas Decorating 2011

There is only one room that I really decorate for Christmas. That is the parlor. And why is this? Because it has a door so that I can keep eager little fingers from breaking touching anything. Mwahahaha!

Let's start with the piano. I flanked either side with a pair of candlesticks I got on clearance at Sears. They are destined for a coat of silver or black paint. I'll get to it after deciding. Next is a polyresin horse head that I think is awesome and Darin thinks is weird. I laid a pair of big polyresin vintage keys  next to the horse head just because. Continuing right is the centerpiece. I bought a trio of snowflake votives at Bath & Body Works years ago. These are placed on a large, antique, glass platter that I inherited from Darin's grandmother. Then I filled in the empty spaces with cheap mini silver ornaments from Walmart. Next to that is a white statuette of the Holy Family I picked up at Walmart also years ago. I love this piece because it is very intimate and the detailing is exquisite. (I just spelled exquisite correctly on my first try!)


This is the tablescape on top of the short bookcase. I left the swirly candlesticks with the glitter white pillar candles. The wedding pictures are replaced with my glass block nativity (three glass blocks, stuffed with white Christmas lights, topped with ribbon bows, and decaled with black vinyl silhouettes of a nativity scene). On the right is an ornament stand I picked up at Goodwill last year. It displays the custom ornaments I have gotten through personalizationmall.com (love them!) over the years. The one of top is a heart etched with "Our First Christmas," our names and wedding year. The other two are ovals etched with "Baby's First Christmas" and the boys' names and birth years, respectively. I'll have to find a second stand or something if we have anymore kids.


As you may have noticed, the top of my bookcases has pretty much become storage space. But I decided to change that for Christmas, at least. I took down all of the things I'm worried about the boys breaking and put up the following (from left to right) intermingled with a faux pine garland: 3 apothecary jars (each filled with a layer of Epsom salts for faux snow and a pine cone), three small pillar candles stamped with little snowflakes, my 'Be' blocks, a recently acquired crystal candlestick, a little wooden block votive holder decoupaged with scrapbook paper and the word 'believe' complete with glass votive and candle, our glass Bountiful temple wedding cake topper (I wasn't going to put that in reach of little fingers no matter what), a polyresin nativity, a set of 'JOY' blocks that my super crafty sister-in-law made for me, a bouquet of cranberry red flowers in a clear glass vase from the dollar store (I should really etch that vase, huh?), a sepia toned photo from our first family Christmas photo shoot when our first-born was a baby (there's a tree and fireplace in the background and everything), and finally, a plain white pillar candle.


And what would Christmas be without a tree? Our tree sits in front of a window, so it's impossible to get a good picture of it from the front during the day with our little camera. But here is a side view. It is dressed in silver ball and acrylic icicle ornaments serving as a backdrop to the family ornaments. Growing up, Darin's mom had a tradition of buying each child a new Hallmark ornament each year. We have chosen to continue the tradition. There are also some ornaments that belonged to me as a child (like that European painted egg), as well as a few of the snowflakes that my mother crocheted when I was a baby. Those adorned my family's Christmas tree every year for as long as I can remember.


The tree itself isn't much to look at, but considering that we got it for $7.50 in an after-Christmas sale, I really can't complain. It looks better from this angle. ;)


So there you have it--the bulk of my Christmas decorating. Anyone else calling their decorating good enough and bundling up with a cup of hot coco? Have you surprised yourself lately with being able to put together a half-decent display on a table or bookcase? Are you loving the snow (if there is any in your area) but kind of wishing it would go away, or at least melt off the roads?

Monday, December 5, 2011

Appliance Awesomeness

I was browsing the blogsphere for a Christmas card idea, actually, when I stumbled upon this.

kevin {&} amanda
Someone used their Silhouette Cameo to make vinyl decals for their washing machine. Can I just say that my mind has been blown by sheer awesomeness. One day I hope to be cool enough to think of doing something like this on my own. In the mean time, I really need to get some pink and black vinyl to dress up my laundry room appliances!

Anyone else dressed up their appliances lately? Are you scraping your jaw off the floor, too? Want to open a pool to bet how long it is going to take me to actually get around to doing this?

Tuesday, November 29, 2011

The First Cuts

My new Cameo arrived on Monday. Darin didn't want me to open it. Something about it being a Christmas present and I couldn't play with it until then? I don't know. Anyway, I've been experimenting with it and am pleased as pop (is my family the only one that uses that expression?) with it.  See, happiness ->  :)


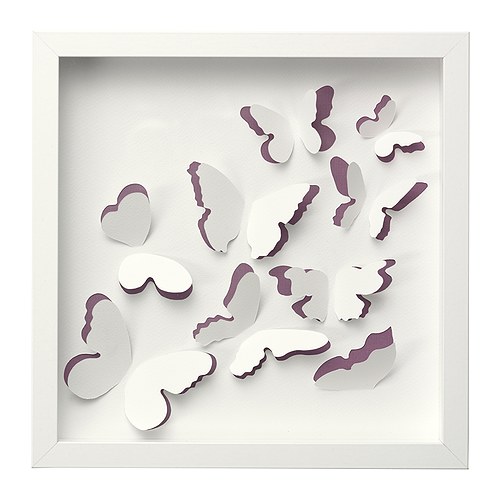
Yesterday I used it to finish a project that I have been stewing over for a while. I saw this at Ikea and was totally inspired. I decided to do my own version for my little sister for Christmas.
Ikea OLUNDA
After figuring out how the Silhouette Studio software works (which you can download for free here, by the way), I put together this little number in barely anytime at all. A little cardstock; a sheet of patterned pink, scrapbook paper; a $6 scrapbook frame from Walmart; and I was in business. Not bad for a first project.


When I first conceived this idea two months ago, I was planning on doing a simpler design and cutting it by hand. I am so glad I waited! I was able to get so many intricate details with the Silhouette Cameo and it is so pretty! I especially love how the fairy's wings turned out. I really hope my sister likes it. :)

Monday, November 28, 2011

Perpetual Birthday Calendar

My hubby and I were talking to his sister last night, and we got on the subject of birthdays. It dawned on me when she mentioned that her husband's birthday is coming up, that I need a birthday calendar.

I thought about designing my own, but why do that when there are plenty of cute ones out there that I can download for free? I have other things to do with my time today than spend hours deciding on a scheme, searching for clip art, and designing my own calendar.

After a quick Google image search for "perpetual birthday calendar free," I settled on this calendar by Elephantshoe Stationery Studios at The Pretty Blog.

http://www.theprettyblog.com/2011/07/birthday-calender-free-printables/
After printing on cardstock and cutting with my Fiskars paper trimmer, I decided to hang it on the wall next to my calendar (so I don't lose it). I used a small hole-punch to--you guessed it--punch a small hole at the top of each page. To keep things simple, I chose to hang the pages on a small nail. At the beginning of every month I'm going to have to take all twelve pages down to rotate to the new month, but it's a small price to pay since I am doing this on the cheap and not having my calendar spiral bound.


Super easy and the whole project probably took no more than half an hour! Love it! Now to track down all of those birthdays and fill it in...

Are you in need of a perpetual birthday calendar? Got any super simple paper projects in the works?

PS. In case you are wondering, I cut one page then used it as a guide to cut the other eleven so that they would all be the same size. Then I used a scrap of cardstock as a template to ensure that all of the punched holes would line up.

Wednesday, November 23, 2011

Quick and Pretty Dollar Store Project

I've been preoccupied lately with making file folder games for my toddler, but I did squeeze in this little project.

I bought a little vase and candlestick on my last trip to Dollar Tree. I had already purchased the Glass Bond for another project (I looked for E6000, which seems to be the most popular adhesive for projects like this, but I think my Hobby Lobby was sold out), so I would say that the grand total for this project was $2.


I simply adhered the vase to the candlestick, following the directions on the Glass Bond. It was so simple, but I think the finished product is quite pretty. Of course I'm a sucker for clear glass.


I'm excited by how versatile this little piece is. It's not very large, but I can use it as a vase for a small bunch of flowers, a votive candle holder, a candy dish, or serve plastic silverware or condiments out of it at a party.

Have any quick and inexpensive projects you've been working on? Any guesses for what I'm going to fill it with for the holidays? (I don't know the answer myself, but I'm looking forward to discovering it!)

Monday, November 21, 2011

One More Thing for the Wall

By now you are probably all sick of reading about my gallery wall, but I did have one more project in the works that I decided to finish after posting about the wall. It is now finished and hung with all the others.

It all started, like so many things, with Pintrest. I saw this and completely fell in love.


It's black, it's shiny, it's contemporary, and it sparkles. Basically, it's everything that I love in decor.

I had a necklace rack that I made about fifteen years ago, with my mom's help, that I wanted to repurpose as wall art. I had incorporated it in the original gallery wall layout, but didn't know how I wanted to decorate it. After seeing this centerpiece, I decided to do an interpretation of it on my old necklace rack.

I started by purchasing a length of crystal garland, some large crystal drops, jewelry chain, and a package of jumprings.


I attached the large drops to sections of the crystal garland and chain (this will make a lot more sense in pictures below), and I spray painted the necklace rack with black gloss spray paint left over from the canvas piece I did a couple of weeks ago. Once the paint was dry, I attached the lengths of crystal with jumprings.


It was looking mighty fine at this point, but was still a bit plain. I decided to try something that I had been pondering and Google searched about. I decided to try using contact paper to add some text to the piece. Ideally I would have used vinyl, but I'm working with what I got.


After settling on a font and size, I printed the word "Family" and taped it to my self-healing mat on top of a piece of white contact paper (also known as adhesive shelf liner). Then I got to work with my craft knife. (Have I mentioned that I want a Silhouette?)

After cutting out each letter, I tried a tip I had read about in blog land--using drywall tape in lieu of transfer tape. I cut a length of drywall tape and placed it over my whole cut piece, then carefully removed the pieces I didn't want (the outside pieces, if you will) so that the letters will still lined up straight. I flipped the whole thing over and removed the backing to expose the sticky side of the contact paper.


I stuck the whole thing on my painted former-necklace rack and thoroughly rubbed the whole thing to make sure it was good and stuck. Then carefully peeled back the drywall tape, making sure that I didn't pull up any contact paper with it, rubbed the letters again for good measure, and stepped back to admire my work.


I think it actually turned out very well. You can't even tell it isn't vinyl from a distance.


And with it hung on the wall as it is, no one is likely to take a close look at it; just stand there and admire it. Oh, am I the only one who does that?


Anyone have some brilliant (and cheaper) alternatives they would like to share? Any new crafts that you sit back and lovingly admire? Have you been inspired lately to reinterpret something you have seen and love to fit your needs?

PS. This project was updated on 1/13/2012 at Updates to "The Wall" with Cameo.

Friday, November 18, 2011

Let It Snow! Coffee Filter Snowflake Tutorial

Is it too early to be thinking about Christmas? Absolutely not! But this post isn't about that. This post is about the fact that I have 200+ coffee filters cluttering up my space. They need to get out of the plastic bag I corralled them in and start doing something useful!


While skimming along in blog-land trying to find a use for these freeloaders, I noticed that quite a few people making the most extraordinary things from coffee filters--flowers, wreathes, bats, spiderwebs, and snowflakes. I, like you, thought it was too early to start making snowflakes; then I thought about the sheer number of coffee filters I have, waiting to be used. I quickly changed my mind. If I start now I might be done by December (or January).

Here's how I do it:
Step 1: Fold & Cut
Fold the coffee filter into twelfths (for a six pointed snowflake), then channel your inner kindergartner and cut those snowflakes! (The one I cut here was supposed to look like a spider web in honor of Halloween; but I didn't like how it turned out, so I didn't post about this back in October.)

Step 2: Starch
... and Dry
I wanted to give my snowflakes a little stiffness since coffee filters are the weight of heavy tissue paper, so I sprayed them with heavy starch and let them air dry on an old towel.

Step 3: Iron
You may notice that the snowflakes look a bit crumpled after being starched. Once they are dry, iron them flat. I used a medium-high setting on my iron. (Tip: Be careful not to accidentally fold over a piece and iron it down. I almost did this a lot.)

And here is the finished product!


At this point, you are free to put them wherever you like--on a window, the inside of a vase, taped on a package, under a clear glass cookie or pie plate. Wherever your imagination leads you!

I chose to tape mine to the wall.


I find it very fun and festive. And it's fascinating to me to see how many different patterns I can come up with!


Have you been channeling your inner kindergartner lately? Are you gearing up for some winter festivities? Have any Christmas decorating plans in the works?

Wednesday, November 16, 2011

Dear Santa

Dear Santa,

For Christmas this year I would like a Silhouette CAMEO.

It is a fantastic personal cutting machine that will slice through anything from vinyl to fabric. The best part? No cartridges! I can choose to either download images from Silhouette's online library, or I can design my own patterns! I can even print out an image then cut it out. Not to mention that I can import any font on my computer into the Silhouette software. The design possibilities are endless!

Thanks for understanding, Santa.

Love, Heather